As a small business owner, do you feel like you’re always running out of time? Time pressure plagues every business, big or small, but it particularly affects small, service-driven businesses – especially one-person businesses.
While no one can wave a magic wand and create more hours in the day, there are ways to reclaim lost time. One terrific way? By implementing systems and automation.
After all, helping small businesses succeed through automation is why we built 17hats.
Why do I need a system?
Many small business owners are scared of systems. But there’s no reason to be! A system is just a way of doing things. That’s it. Just think of it as steps you take to obtain a result you want.
A quick example:
Desired result: Wake up to a clean desk.
Step-by-step system: At the end of the day, I will:
- Throw away my trash
- File my paperwork
- Stack tomorrow’s work on the corner file
- Push my chair under my desk
Voilà – that’s a system!
Systems can be as simple or as complex as you want. It’s your system, and you’re in control.
That brings us back to running out of time in the day.
Work will always expand to fill (or exceed) the time available. On top of that, life gets in the way … a lot. To make the most of the time you have, to deliver on time, and to maintain some semblance of work/life balance, you guessed it … you need a system.
Selling and delivering
It’s so exciting to get the sale. The money comes in, and you are stoked.
But, many times, small business owners fall short when it comes to delivery.
On that one hand, that’s understandable: At any given moment, small business owners have their hair on fire. They’re chasing after leads, tracking down payments, prioritizing hot to-dos, and juggling client deadlines. It’s no wonder that some things fall through the cracks.
But, before you know it, the delivery phase in particular suffers from the stress. Angry clients start to wonder aloud when they will receive their already paid-for items. That’s not a good way to end the client experience!
Our newest feature to the rescue
Well, that doesn’t have to happen again.
With our newest 17hats feature, Workflows for Products, you can create a system that ensures you will deliver on time, each and every time.
Or, you can be an overachiever, and set up your system to ensure that you deliver before the deadline! (Now that’s a rave-worthy experience destined to get you referrals.)
Incidentally, even though the feature is called Workflows for Products, it applies to anything you sell, including services.
Product delivery assurance
For each product or service that your client buys, there is a set of steps you must complete to deliver. The prep work, creation, reviewing, and final delivery leave you with endless to-dos to keep track of. Meanwhile, if your client buys several products or services – yay, more money! – it’s even more to do.
Now, with 17hats, you can create a Workflow for each of your products and services. Next, add the Workflow to your product in 17hats. Then, when a payment is made for that product on your invoice, the Workflow will automatically trigger.
That means all the to-dos needed to create and deliver the product will be added to your calendar. (Not to mention your client’s Project Page and your 17hats Dashboard.) You’ll know what to do, and when to do it. When you’re organized, you can deliver on time, without the stressing over the deadline.
I consider Workflows for Products to be your safeguard against the busy-ness of life. By investing the time to set up your Workflow, you avoid the stress of remembering the details and the deadlines.
Setup steps
There are three simple stages to setting up your Workflows for Products: Planning, Building, and Connecting.
Step one: Planning
Planning your Workflow is very important, and while you might be tempted to skip this step, I HIGHLY RECOMMEND not to. Also, another recommendation: Don’t build ALL your Workflows for ALL your products and services at once. That’s too overwhelming. Do one … get the hang of it … and then do a few more.
All right, enough of the recommendations – on to the instructions.
Grab a sheet of paper and write down a few of your most popular products or services. Decide which is the easiest to parcel out into steps. Starting with an easy product or service is a great way to familiarize yourself with the setup process. (Especially if you haven’t built a Workflow before.)
Next, think about “creating” that product or service. Write out each step involved. It’s as simple as making a list. For example, if I were a dog groomer itemizing the steps for my doggie nail trim service, it would look something like this:
- Collect nail trimming supplies
- Clean and prep my station
- Trim the dog’s nails
- Write my doggie report
- Send an email that the dog is ready to be picked up
- Clean the supplies I used
- Clean my station
If you’ve never broken down a product or service into steps before, think of it as if you were training an assistant. What would he or she need to do?
Once you have identified the steps, you can group those steps into phases. Using our example above, steps 1 and 2 would be prep work. Steps 4 through 7 would be post work. Step 3 is the actual service, which some want to put into the Workflow and others do not. It’s a personal choice. Also: If you want to be advanced when you create your Workflow, you can break down the Workflow into phases, but that’s optional.
Step two: Building your Workflow
If you’ve never built a Workflow before, please don’t be intimidated. It’s easier than most people think. To start, you’ll want to create a new template. To do that:
- Log in to your account.
- In the main navigation (along the left rail in the desktop or via the “hamburger” menu in mobile), click on Workflow. Use this link as a shortcut. Then select the “+Create Template” button in the top left corner.
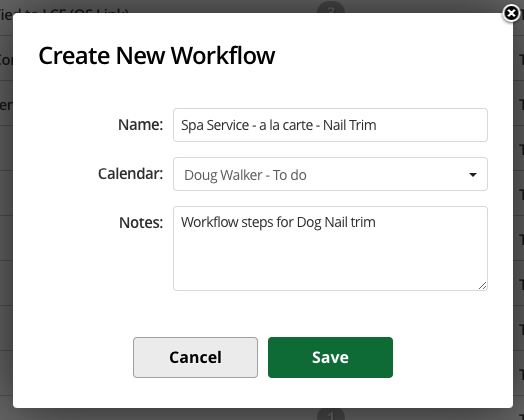
- In the screen that appears next (“Create New Workflow”), name your Workflow and select the calendar you would like to use before saving.
- In the “New Template” area that appears next, click “Add” and then select either “To-Do” or “Action” in the drop-down menu.
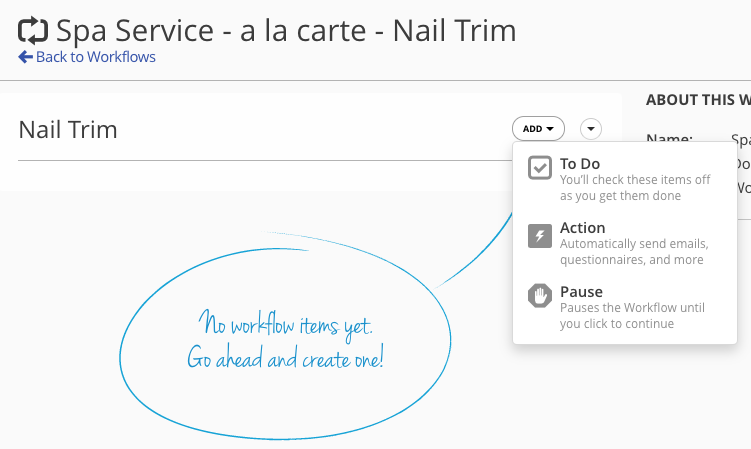
When building your Workflow, you will add To-Do items for your to-dos and Action items for the things that 17hats can do for you, such as sending an email.
The steps that you identified earlier, like steps 1 through 7 above, each get translated into a To-Do or an Action.
Base date
When adding the steps, you can decide when the step is due. You can have items due before, on, or after a “base date.”
What’s a base date? The base date is a little different with Workflows for Products, since some products and services are sold before the project date, while others can be sold after the project date.
If the product is sold before the project date, the base date will automatically be the project date.
If the Product is sold after the project date, the base date will automatically be the date that the Workflow is triggered.
Because of this, it is very important to know when this product is sold.
Step three: Connecting
Once the Workflow is built, you will need to add it to your Products & Services under Account Settings. To do this:
- Log into your account.
- Click on Account Settings (the gear in the upper right on your desktop or at the bottom when you click on the “hamburger” menu in mobile).
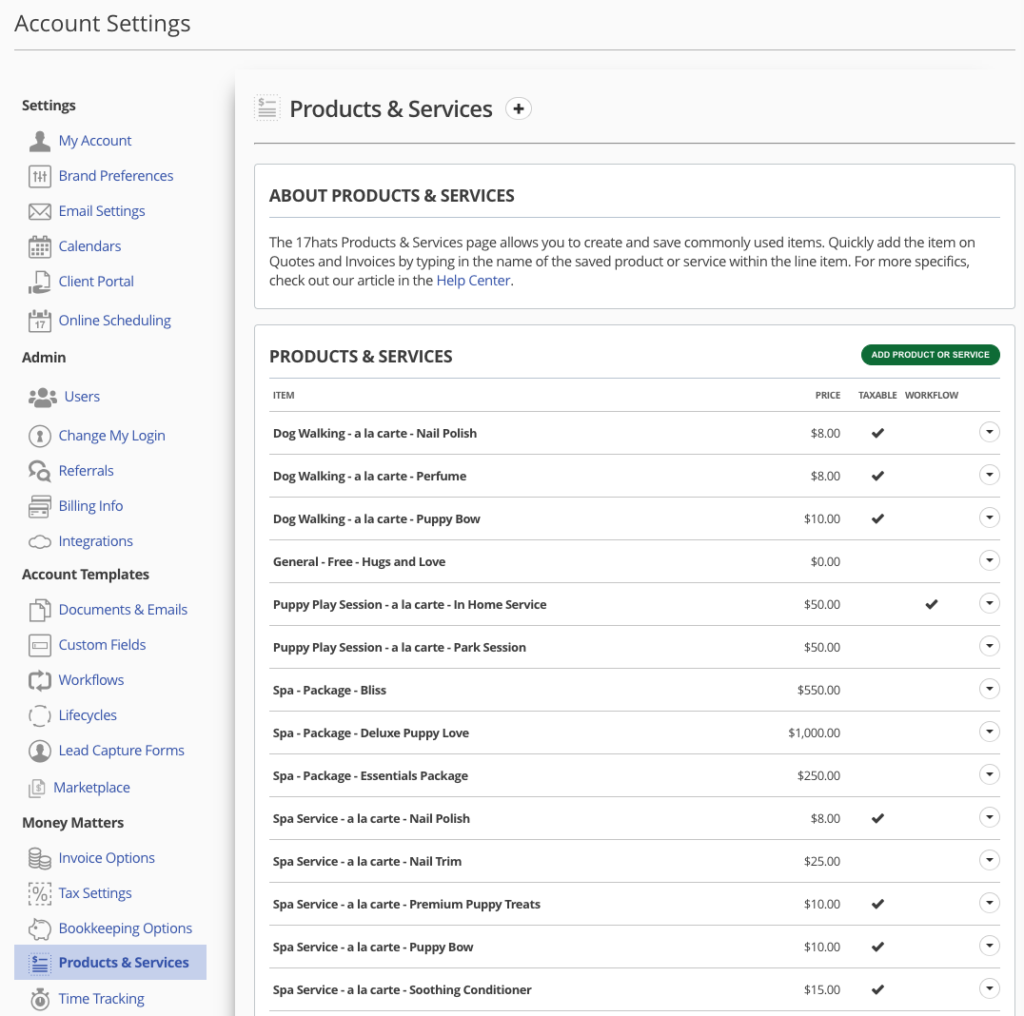
- Under Money Matters, click on Products & Services. (In mobile, click on the hamburger menu to the right of Account Settings to reveal the drop-down menu.) Use this link as a shortcut.
- Your products will be displayed on the screen that follows.
- Select your appropriate product or service.
- Add your new Workflow to this product or service.
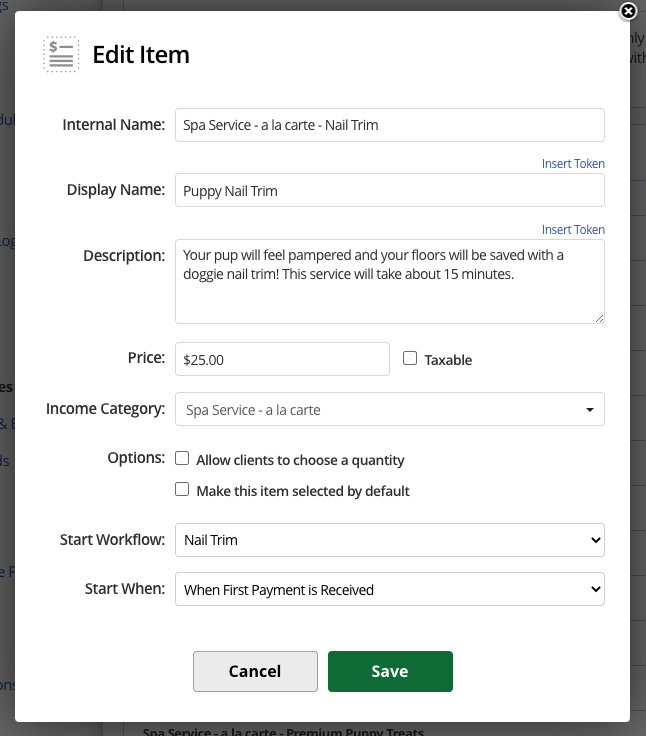
Once your Workflow has been added to the product or service, you will be able to select if you want the Workflow to trigger when the invoice is paid in full, or when the invoice receives a first payment.
Congrats – you’re done!
If you want to try it out for yourself, I recommend that you create a test Contact and a test Project. Just add yourself as a Contact using your personal email address (not your 17hats email address), and create a Project titled Test. Then you can create an invoice, manually pay, and see your Workflow in action. Just don’t forget to remove the payment so that all your books and reports stay accurate.
Need more help?
If you find any of this challenging, or if you get stuck, please don’t stare at it for hours and get frustrated. Our business support team is standing by ready to help. They are happy to walk you through each step.
Support hours are Monday through Friday, 7 a.m. to 4 p.m. Pacific (10-7 Eastern). You can initiate a chat inside the app (using the green chat icon in the lower right corner) or email them directly at support@17hats.com.
Latest Posts


How to Run a Client Experience Audit (Step-by-Step)
July 22, 2026
5 Ways Manual Processes Are Quietly Costing You Money
July 21, 2026