Tagging is a system that helps keep your Contacts and Projects organized in 17hats. While you can add tags manually in 17hats, now you can apply tags automatically through a new Workflow feature to ensure your business stays organized.
What is Tagging?
Tagging in 17hats is not much different than the way you would add labels to your kitchen and garage containers when attempting to organize. It truly is the simplest and easiest form of organization that we do in everyday life and you should also be doing it in your 17hats account to benefit your business.
There are unlimited tags that you can add to your Contacts and Projects. Yes, 17hats allows you to tag both your Contact and your Project with different tags. It’s a level of organization that becomes increasingly helpful as your business grows.
If you find yourself needing some inspiration on what tags to use, check out 17hats education specialist, Jennifer Mills Blume’s blog, 17 Ways to Use Tags in 17hats.

Why should you use Tags in 17hats?
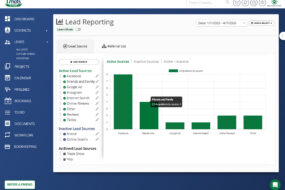
By adding Tags to Contacts and Projects you will easily be able to filter and view the tagged group in your Contacts, Leads, Projects, and Recent Client Activity pages. This will give you quick access to their project and the ability to add bulk actions. This quick look of being able to see the number of people with a certain tag also allows you a nice overview of what is happening in your business.
Tags for New Leads and Booked Clients
Keeping track of your leads and your booked clients is exactly what 17hats was built to do, so having a ‘lead’ and ‘booked’ tag is the simplest way to start with tagging.
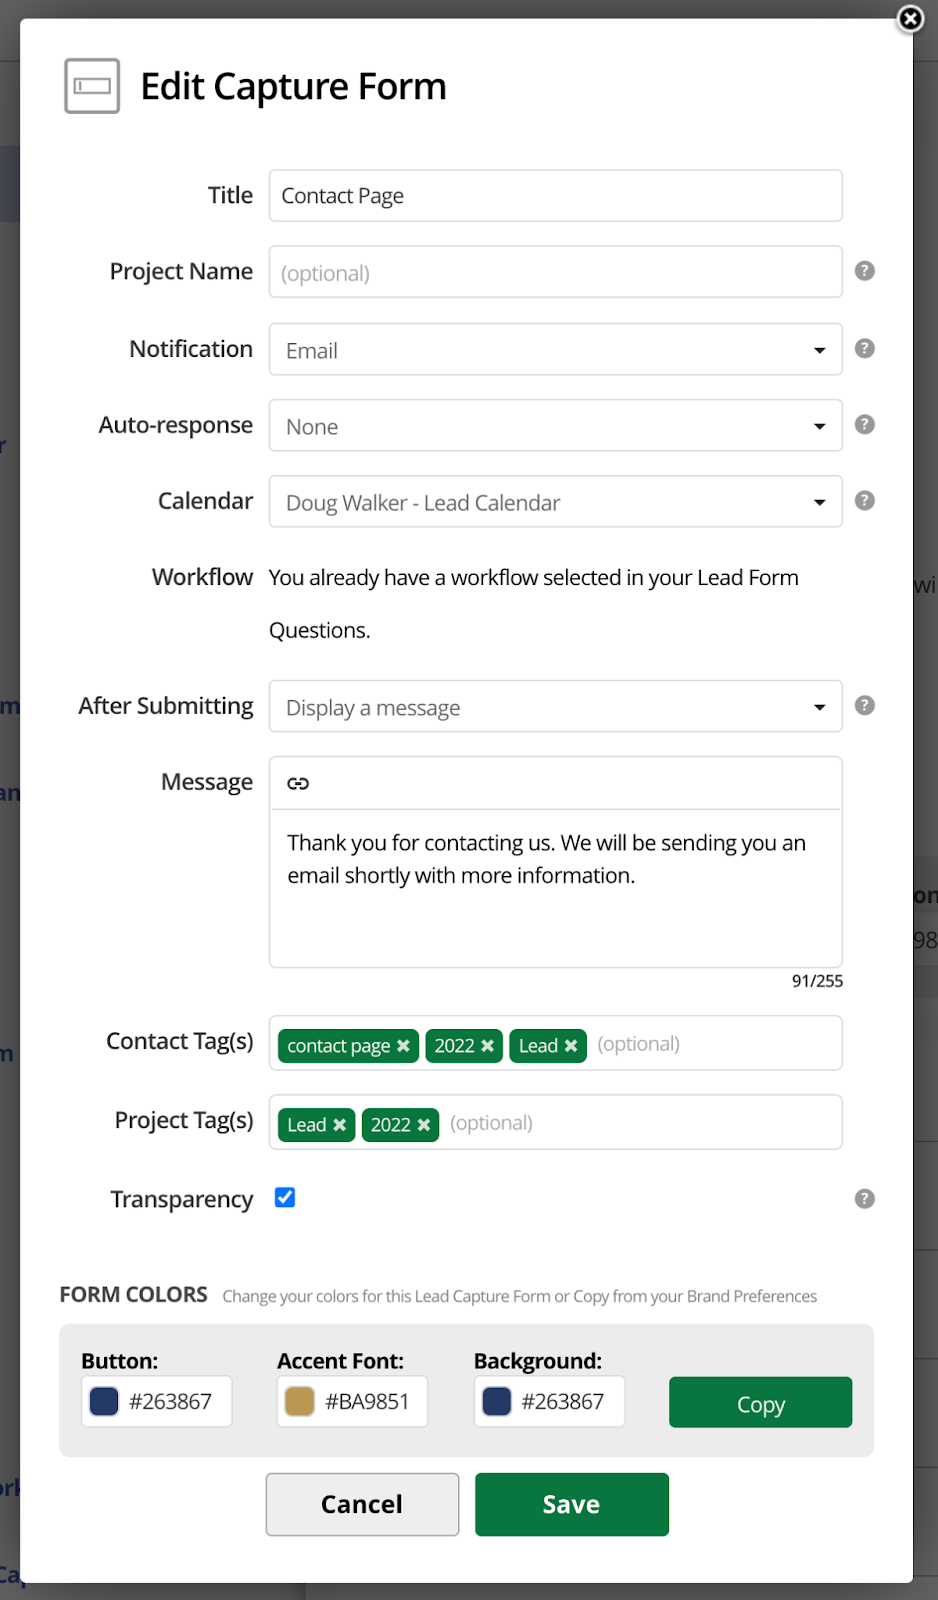
Each lead that comes in through a 17hats Lead Capture Form can automatically be tagged with a ‘lead’ contact and project tag. As you can see from the Lead Capture Form Settings to the right, I have added the year and lead tag to both contact and project. This automatic action will ensure that each new lead is properly tagged.
Advanced Tip: Create a new lead capture form for each location you want to install a form. Then add the location of the LCF as a contact tag. Then you can track where your leads are coming from. Notice on the form above the Lead Capture Form Title is Contact Page as this form is installed on my contact page on the website. Then The Contact Page tag is added as a contact tag.
Once your lead books with you, then a 17hats Workflow with the addition of Action Item: Add/Remove Tags can automatically remove the ‘Lead’ tags and add the ‘Booked’ tags.
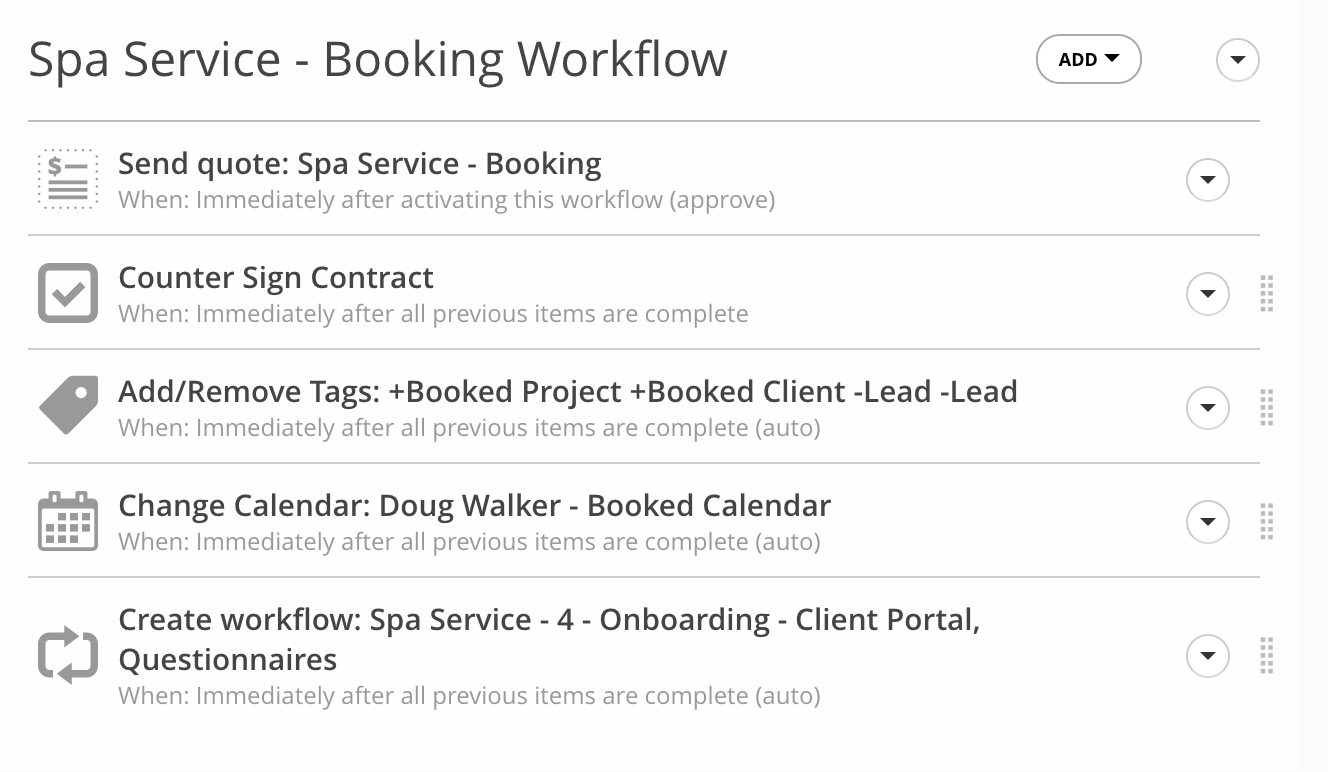
As you can see to the right, I have set up my booking workflow to send the Quote, Contact, and Invoice. After the documents are completed and I have counter-signed the contract, the ‘booked project’ and ‘booked client’ tags are added, and the ‘lead’ contact and project tags are removed. This automation ensures my contact and project tags stay in sync with where they are in my client experience.
Setting the Action Item in a Workflow is very simple. From your Workflow, click Add then Action. Next, select Add/Remove Tags from the list of actions. Finally, you will be able to see the tags you wish to have added and removed.
Track your Client Experience

If you want to go a step even further, you can track your whole client experience through the automation of tagging in your workflow.
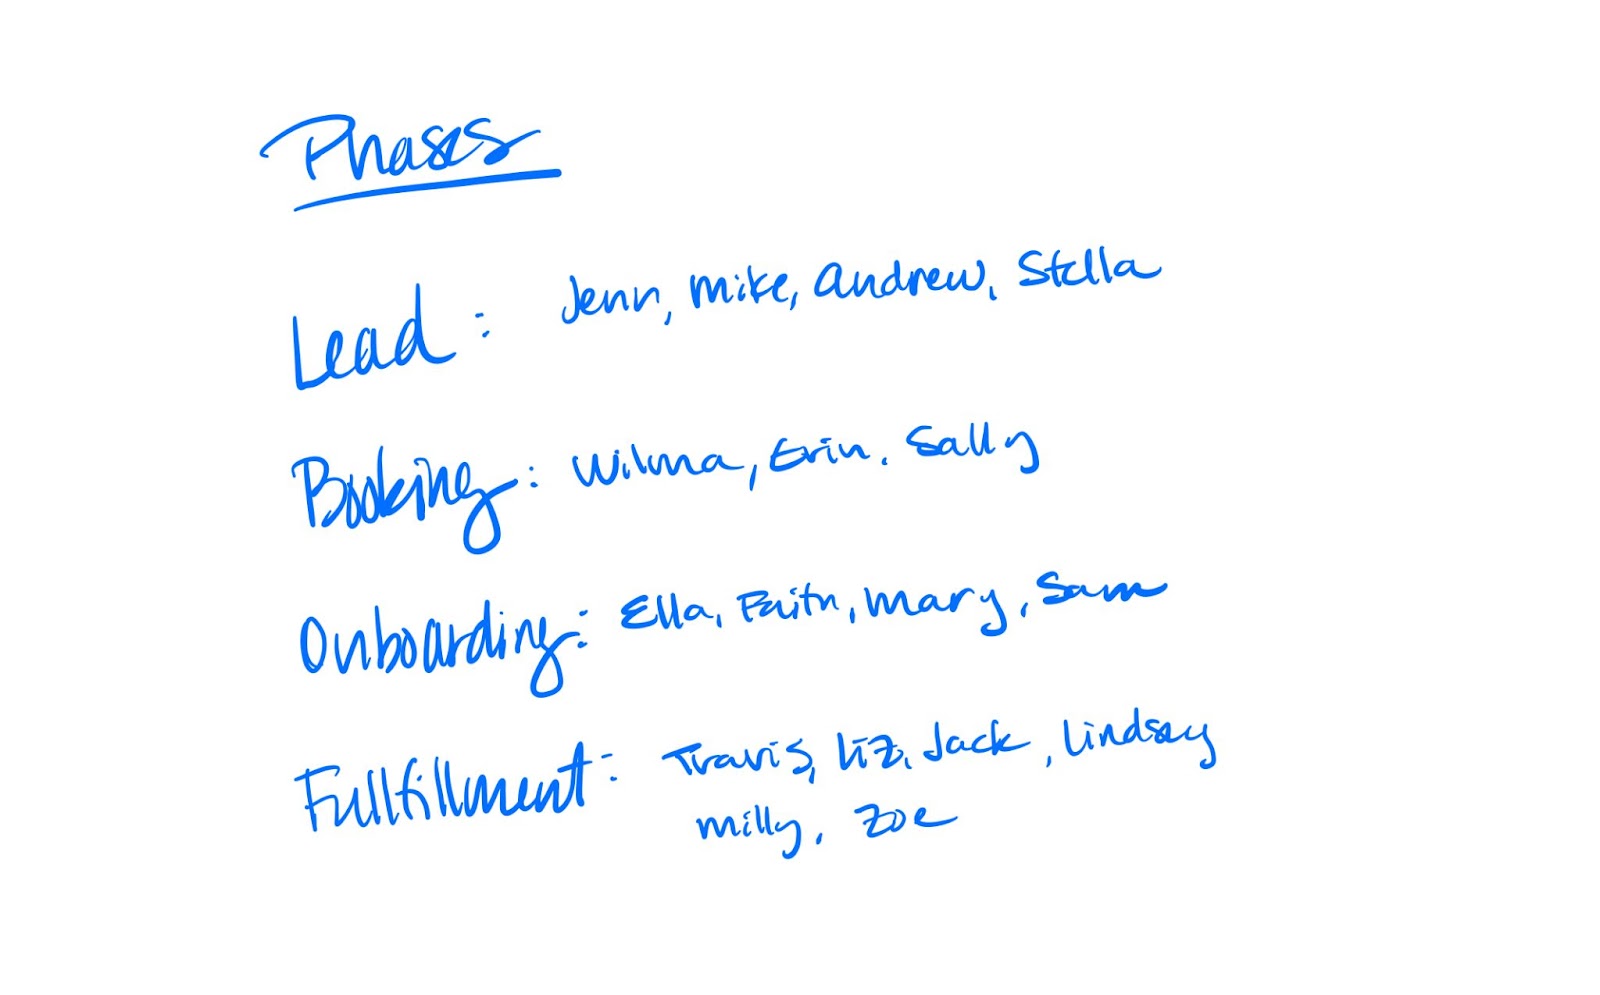
Your client experience is made up of different stages. Starting with a lead experience when they first contact you (which would be your lead tag from above). Then to your booking experience with the sending of booking documents, onboarding experience once they book with you, and finally your fulfillment experience which is when you are delivering your service.
You actually might be doing this already. Many people track their clients through the different phases via a whiteboard. There’s a feeling of relief to the chaos when you can see who is where in your system.
By setting your workflow to trigger a tag based on what stage your client is in, you will be able to track how many projects you have in each phase.
From the workflow below you can see I have taken my tags up a notch. As soon as the booking documents are sent to the lead, I have removed the ‘Lead’ project tag and added the ‘Lead Booking Phase’ project tag.
By doing this, I will be able to distinguish between leads I have not sent booking documents to and those I have not.
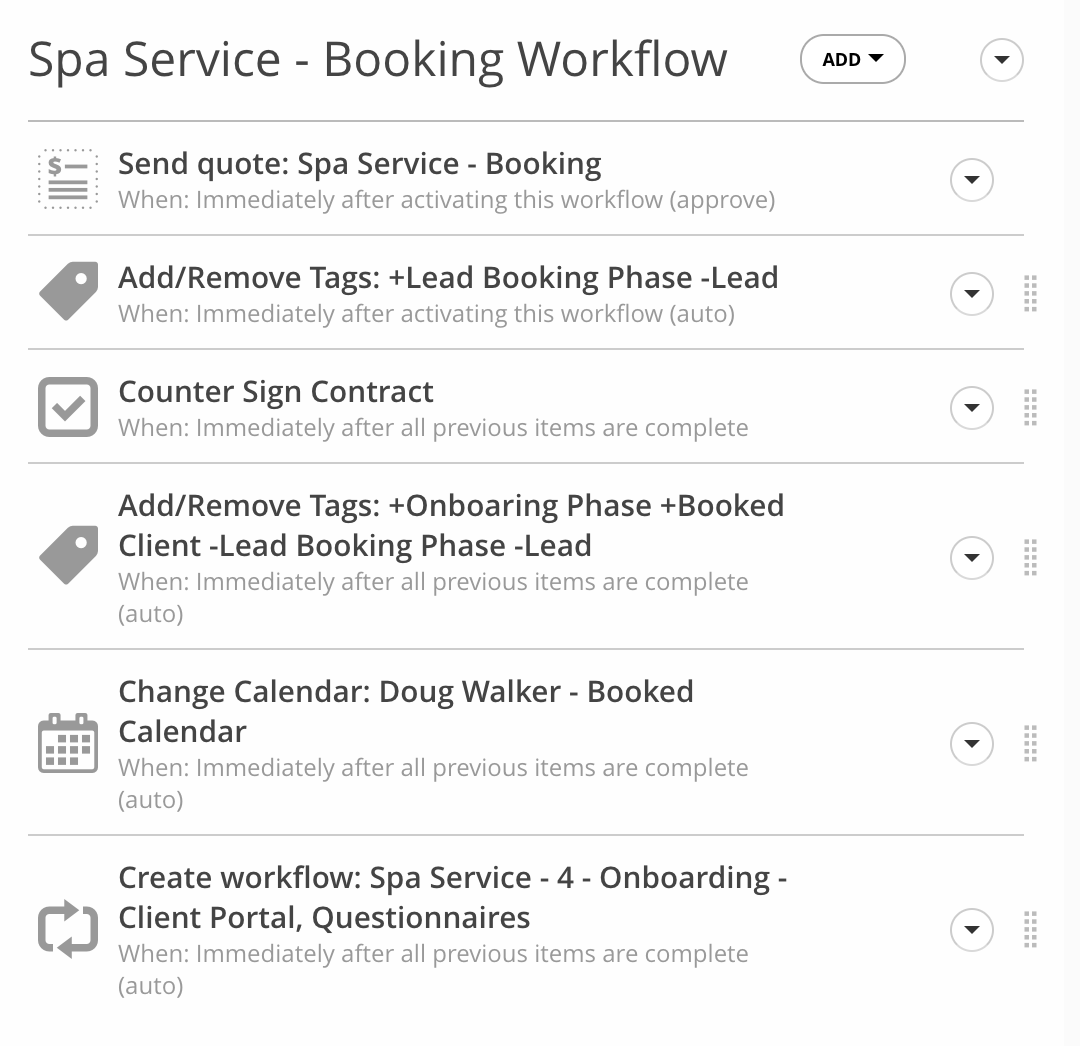
Then, once the booking documents have been completed, I remove the ‘Lead Booking Phase Project’ tag and add ‘Onboarding Phase’ project tag.
Notice that I am only adjusting the project tag and not the contact tag because I only want to follow the project through all the phases.
Contact tags are simply ‘lead’ and ‘booked’. There is no need to follow the contact through the project phases.
By following the phases of your project through automatic tagging, you will quickly be able to see those projects on your Projects page. This is an easy step and setup within workflows that you don’t want to leave out. Having this basic organization will keep you in the know of what is happening in your business.
Latest Posts

How to Convert Leads Into Clients (Without Chasing)
July 29, 2026


How to Run a Client Experience Audit (Step-by-Step)
July 22, 2026
5 Ways Manual Processes Are Quietly Costing You Money
July 21, 2026