
Ever feel like your projects are everywhere? One lead is waiting on a quote, another just signed a contract, and someone else ghosted three weeks ago… 🙈 Yikes!
It’s hard to deliver a great experience when you’re constantly wondering, “Did I ever send them the contract?”
Enter: Pipelines – your new visual tool inside 17hats.
So… What’s a Pipeline Anyway?
Think of a pipeline as your visual roadmap for a process. Whether you’re booking clients, managing projects, onboarding new clients, or delivering final files, your Pipeline lets you see exactly where each person or project stands.
Instead of playing the “dig through emails and hope for the best” game, you get a clean, organized view of your workflow. 🙌
No more dropped balls. No more missed steps. No more “Wait… where was I with them again?”
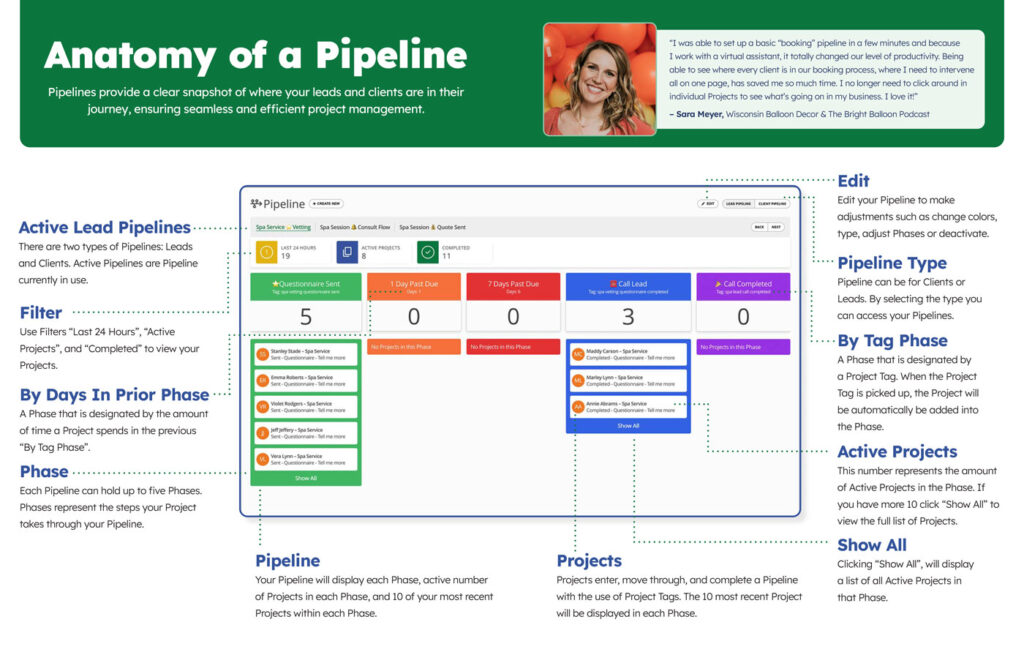
Pipeline Terminology:
Pipeline – A visual representation of where your leads and clients are in your client experience.
Phase – A Pipeline is made up of five or fewer Phases. Phases are the steps or actions that move them through the Pipeline.
Project Tag – Project Tags move Projects into, through, and out of Pipelines.
Why You’ll Love Using Pipelines
- 👀 Total visibility – You’ll always know what stage your leads and clients are in.
- ✅ Consistency – Every client goes through the same process = fewer mistakes + better experience.
- ⏱️ Time saver – No more double-checking your calendar, inbox, and sticky notes.
Ways to Use Pipelines in Your Business
Since Pipelines use custom Tags to move through Phases, there’s no one-size-fits-all here (yay!). You can build Pipelines that match your unique processes.
Here are a few of my go-to Pipelines to get your wheels turning:
📱 Lead Pipeline
Phases for a Lead Pipeline might look like:
- New Inquiry
- Initial Response Sent
- Consultation Booked (Completed phase of the Pipeline)
💸 Booking Pipeline
Track your booking process with these suggested Phases:
- Contract Sent
- Contract Signed
- Invoice Sent
- Invoice Paid (Completed phase of the Pipeline)
🔎 Onboarding Pipeline
Perfect for new clients. Try these Phases in your Client Pipeline:
- Welcome Email Sent
- Questionnaire Received
- Kickoff Call Booked
- Project Setup Complete (Completed phase of the Pipeline)
How to Set It Up Your Pipelines (It’s Easier Than You Think!)
First, Build Your Pipeline
- Head to your Pipelines tab.
- Click “Create New” and give it a name that makes sense (ex: “Quote Sent” or “Consultation Call”).
- Add your 5 Phases—think through this part of your client process from start to finish.
- Assign relevant Project Tags to each Phase, or use the Days in Prior Phase setting. (optional: assign colors to specific Phases of your Pipeline)
- Hit save, do a happy dance 💃!
Next, Update (or Create) Workflow
Workflows and Pipelines? Peanut butter & jelly.
While you can always move Projects through a Pipeline by manually adding/removing tags, the magic of automation happens when you pair your Pipeline with a Workflow. ✨
If you are already using Workflows for your process, add the Project tag during the appropriate Workflow step. If you are NOT using Workflows, now’s a great time to start!
Here’s a help article that overviews the Workflow feature.
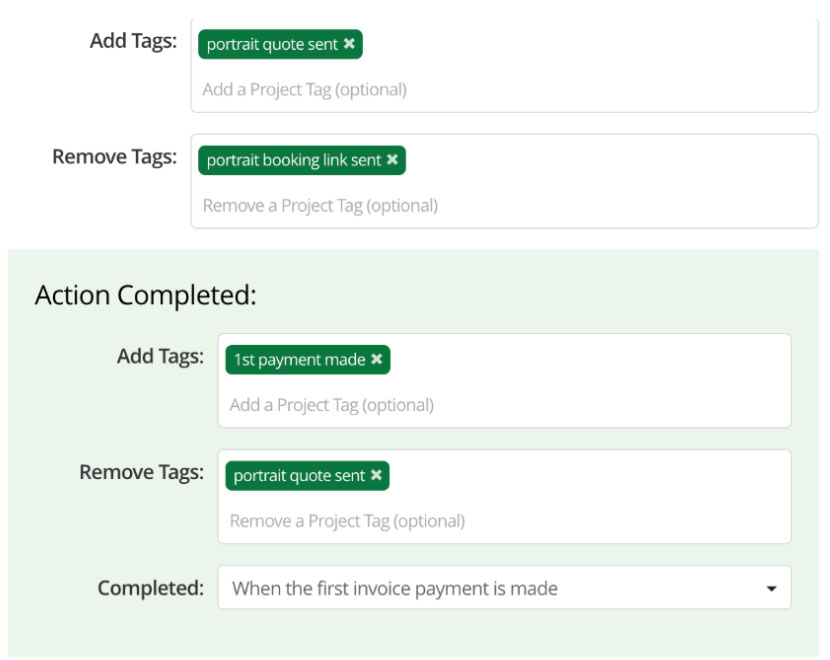
💡Let’s Talk Tags Together
Let’s take the sample Booking Pipeline from above and walk through the Project Tags within a Workflow together:
💸 Booking Pipeline:
- Contract Sent tag
- Contract Signed tag
- Invoice Sent tag
- Invoice Paid tag (completes Pipeline)
If you’ve ever wished your brain had a dashboard, this is it. Pipelines give you a birds eye view over your business—and honestly it feels really good to see everything flowing smoothly.
So go ahead. Set one up. Tweak it. Test the Pipeline on yourself. You’ll never go back to the old “guess and hope” method again. ✨
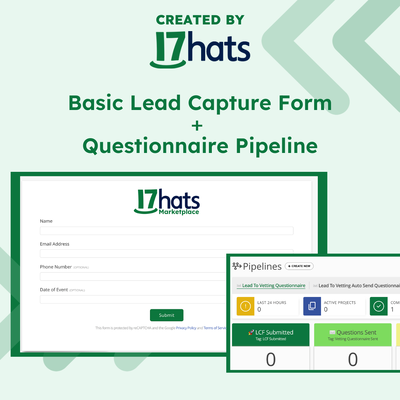
Basic Lead Capture Form + Vetting Questionnaire Pipeline
This Lead Capture Form and Questionnaire Pipeline will help you visually track your clients through the Vetting Questionnaire process.
Latest Posts


Best Moxie Alternatives for Service Businesses
March 18, 2026